|Breaking the COVID bread
So below are the the two recipes that I have settled on for the classic white and brown loaves. I have listed the equipment that I used (hence the brand name mentions). Over the years I have had to tweak and amend recipes for the environment of my own kitchen and my skill set, so it should make perfect sense that if you know what I used it will help with your own adjustments.
|The Classic White Loaf
INGREDIENTS
- 500 grams Strong White Bread Flour [DOVES FARM organic, Allinson’s Strong White]
- 3 tablespoons of Olive Oil
- 300 mls Lukewarm Water
- 2 teaspoons Sugar
- 1½ teaspoons Salt
- 10 grams of Dried Yeast [McDougalls Fast Action Dried Yeast]
- Butter to rub inside loaf tin
- Extra Olive Oil to rub in large plastic or glass bowl
- Extra Flour to dust loaf with before backing
EQUIPMENT
- 800 watt stand mixer with dough hook attachment [SMEG Stand Mixer]
- 1.5 litre (2 lbs)non stick bread tin [Jamie Oliver Bakeware Range Non-Stick Loaf Tin]
- Hand whisk [Not electric]
- Large plastic or glass bowl
- Parchment or baking paper
- Clean tea towel
- Small [10 cm] bowl
- Kitchen scales
- Small sieve
- Oven gloves
- Table spoon
- Tea spoon
- Wire cooling rack
It becomes addictive making bread and once you crack it, is utterly satisfying.
METHOD
Using the scales weigh the flour and put into the bowl of the stand mixer. To this add the salt and the tablespoons of olive oil.
Take your small bowl and put the dried yeast. Most recipes suggest 7 grams but I found that the extra 3 grams is useful and gives a better rise. To avoid spoiling extra sachets, I keep a jar of dried yeast to add to the sachet contents. Into the bowl add 150 mls of the lukewarm water. The water should be around 35° – 37° centigrade. if you make up bottles of baby milk, the temperature is the same as this. If the water is too hot the yeast will be killed, if too cold it may not active the yeast or the rises will take longer.
Once the water is added, whisk the contents and then put aside for 5 minutes.
Tip the yeast mixture into the the stand mixer bowl containing your flour. Using the dough hook set the mixer going (at the fastest speed for the dough hook attachment for your equipment). Now slowly start pouring in the other 150 mls of lukewarm water. Do not add it at once and allow the dough hook to start combining the ingredients. Keep adding slowly until a dough ball forms. It should be moving around in the bowl without leaving residue on the sides. If it appears too wet, wait for a few minutes and allow the dough hook to do its job. If after waiting it still appears too wet add in some extra flour (a teaspoon at a time), waiting for 15 – 20 seconds between each teaspoon. I find that I never use the full 300 mls of luke warm water and invariably have about 20 -30 mls left over. When the dough ball forms, I momentarily stop the stand mixer and knead it quickly with my hand (in the stand mixer bowl) to get a feel for the consistency and to assure myself that the right amount of fluid has been added.
Once you are happy with the consistency of your dough ball, let the dough hook knead it for 10 minutes.
After 10 minutes you should have a smooth, elasticky dough ball.
Smear some olive oil across the surface of your large plastic or glass bowl. Put the dough ball into it. Cover it with the baking parchment and then wet the tea towel and place over the parchment paper. The baking parchment stops the dough sticking to the tea towel. The wet tea towel ensures that the dough will not dry out as it rises. There is another method for this. If you take a large plastic bag (you can buy them as proving bags), smear olive oil on the inside of it and then put your bowl with the dough into the bag. Then finally tie the end of the bag up or fold over to seal it.
Regardless of the method used, put the bowl with its paper or tea towel or inside the proving bag in a warm place. The definition of a ‘warm place’ is where the ambient temperature is at least above 21° centigrade and ideally around the 30° centigrade mark. I use our airing cupboard and perch the bowl on top of the boiler. We also have a steam oven which I sometimes use, setting the oven for ‘dry heat’ at 41° centigrade. You can also use a standard oven (ideally fan assisted) set to a similar temperature as the steam oven. It can also be just left on the kitchen counter. It may take longer to rise but if the yeast is active it will rise.
Leave the bowl for 1 hour or until the dough ball has doubled in size. In my airing cupboard the doubling time is usually 45 minutes.
Knock the dough back, even knead it for a few minutes by hand. Then shape it into an oblong and fold one end into the centre and the other end over that, tucking it under almost. At this stage you should have a mini loaf shape. Put it into your loaf tin (which should be greased with some butter), dust some flour over it through the sieve.
Put the parchment paper and tea towel over the loaf tin and put it back in the warm place. Leave it there for a hour or until it has risen just above the edge of the tin. Whilst it is rising preheat the oven (200° centigrade for a fan/ non fan assisted oven).
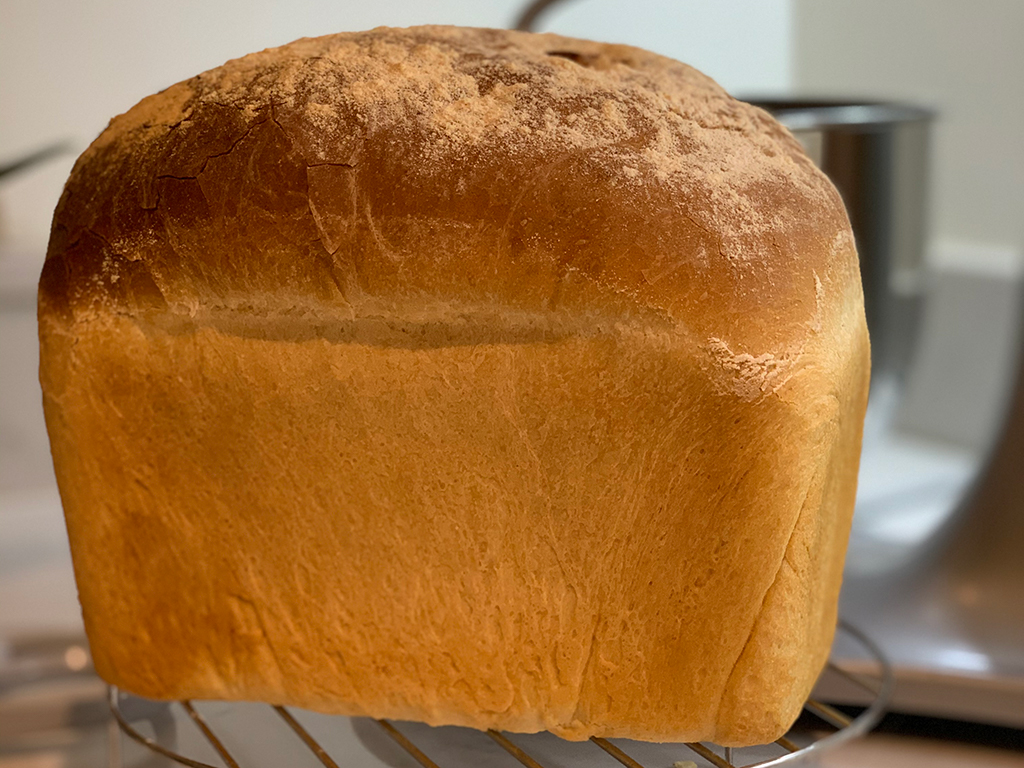
When the dough has risen, remove the parchment paper and tea towel and put it into the oven for 30 minutes. When it has baked take it out and using your oven gloves invert the tin so the loaf comes out. When you knock loaf on the bottom it should have a hollow sound. If it’s a dull sound it hasn’t finished baking, so put it back for another 5 or 10 minutes. Put your freshly baked loaf on a wire rack to cool.
Once cooled, store it in a bread tin. We keep ours under a cake cloche on a plate. it should keep for 5 days at least and should not dry out.
TIPS
To obtain consistency in your end product will take a few goes but not as long as you would imagine. One peculiar physiological result of eating bread that you have baked is if you revert to supermarket bread it is likely that it will taste too salty. This is something our household has noticed (it also could be a sequelae of having had SARS-COV2).
Whilst end to end the process of baking bread takes approximately two hours you should remember the preparation of the dough excluding waiting it to prove takes 15 minutes. If you are in a rush you can omit the first rise. However the end result has a denser crumb structure. it will make great toast but less so as sandwich bread. There is a good explanation of why bread dough should be left to rise twice here.

The SMEG stand mixer was an aesthetic purchase. it does the job but after 1 year of use the bowl has detached from its handle!
To understand if it has been left to rise (prove) adequately gently poke a finger into the dough. If it springs back almost instantaneously then it needs more time, if it slowly springs back but doesn’t totally return to hide the indentation, then it has proved adequately. if it doesn’t spring back at all then it has risen too much. If you bake over proved dough the resulting loaf will have a loose crumb structure and probably won’t do the final rise in the oven when baking. If your dough has been left too long to rise, knock it back, knead it and then let it rise again. there should be enough fuel for the yeast to do this and you make rescue your dough.
I use an over sized loaf tin and hence you can use a smaller one, in fact most recipes suggest a 1 lb loaf tin and not the 2 lb I use. If you are looking for loaf tins I would recommend Silverwood bakeware. Delia smith online also recommends this range.
Experiment with the equipment and proving time until you get a loaf that suits your palette.

|Wholemeal Loaf
INGREDIENTS
- 450 grams Wholemeal Flour [Waitrose Duchy Stoneground Plain Wholemeal Flour]
- 2 tablespoons of Olive Oil
- 320 mls Lukewarm Water
- 1 teaspoon Sugar
- 1 dessert spoon Salt
- 7 grams of Dried Yeast [McDougalls Fast Action Dried Yeast]
- Butter to rub inside loaf tin
- Extra flour to dust loaf with before backing
EQUIPMENT
- 800 watt stand mixer with dough hook attachment [SMEG Stand Mixer]
- 1.5 litre (2 lbs)non stick bread tin [Jamie Oliver Bakeware Range Non-Stick Loaf Tin]
- Hand whisk [Not electric]
- Parchment or baking paper
- Clean tea towel
- Small [10 cm] bowl
- Kitchen scales
- Small sieve
- Oven gloves
- Table spoon
- Dessert spoon
- Tea spoon
- Wire cooling rack

Wholemeal loaves are faster to bake but ensuring there is adequate water is crucial.
METHOD
Using the scales weigh the flour and put into the bowl of the stand mixer. To this add the salt and the tablespoons of olive oil.
Take your small bowl and put the dried yeast. Into the bowl add 150 mls of the lukewarm water. If the water is too hot the yeast will be killed, if too cold it may not active the yeast or the rises will take longer.
Once the water is added, whisk the contents and then put aside for 5 minutes.
Tip the yeast mixture into the the stand mixer bowl containing your flour. Using the dough hook set the mixer going (at the fastest speed for the dough hook attachment for your equipment). Now slowly start pouring in the other 170 mls of lukewarm water. Do not add it at once and allow the dough hook to start combining the ingredients. Keep adding slowly until a dough ball forms. It should be moving around in the bowl without leaving residue on the sides. If it appears too wet, wait for a few minutes and allow the dough hook to do its job. If after waiting it still appears too wet add in some extra flour (a teaspoon at a time), waiting for 15 – 20 seconds between each teaspoon. I try to add as much of the water as possible, so unlike the white loaf dough, this dough maybe wetter.
Once you are happy with the consistency of your dough ball, let the dough hook knead it for 10 minutes.
After 10 minutes you should have a smooth(ish) dough ball. It will not be as smooth or have the same elasticity as the white flour dough.
Once the dough has been kneaded, shape it into an oblong. Fold one end into the centre and the other end over that, tucking it under almost. At this stage you should have a mini loaf shape. Put it into your loaf tin (which should be greased with some butter), dust some flour over it through the sieve.
Put a piece of parchment or baking paper and tea towel over the loaf tin and put it in a the warm place (see above for the definition of a warm place). Leave it there for a hour or until it has risen just above the edge of the tin. Whilst it is rising preheat the oven (200° centigrade for a fan/ non fan assisted oven).
When the dough has risen, remove the parchment paper and tea towel and put it into the oven for 30 minutes. When it has baked take it out and using your oven gloves invert the tin so the loaf comes out. When you knock loaf on the bottom it should have a hollow sound. If it’s a dull sound it hasn’t finished baking, so put it back for another 5 or 10 minutes. Put your freshly baked loaf on a wire rack to cool.
Once cooled, store it in a bread tin. We keep ours under a cake cloche on a plate. it should keep for 5 days at least and should not dry out.
TIPS
With wholemeal loaves getting the water content right is key. The first ones I made were far too dry and hence fell apart easily when being sliced or put into the toaster. I would recommend adding too much to the dough and then correcting with some extra flour to balance it out. It’s okay if the dough is a bit more sticky than the white loaf dough when being kneaded.
I also add seeds to the top of the dough along with the flour prior to baking. I would press the seeds in, otherwise they seem to fall off when you invert the loaf tin to remove the baked loaf. The mixed seeds packets that can be found in the baking section of supermarkets do the trick or you can go upmarket to an organic health food shop.

|SUPPLEMENTAL

Saccharomyces cerevisiae yeast, 3D illustration.